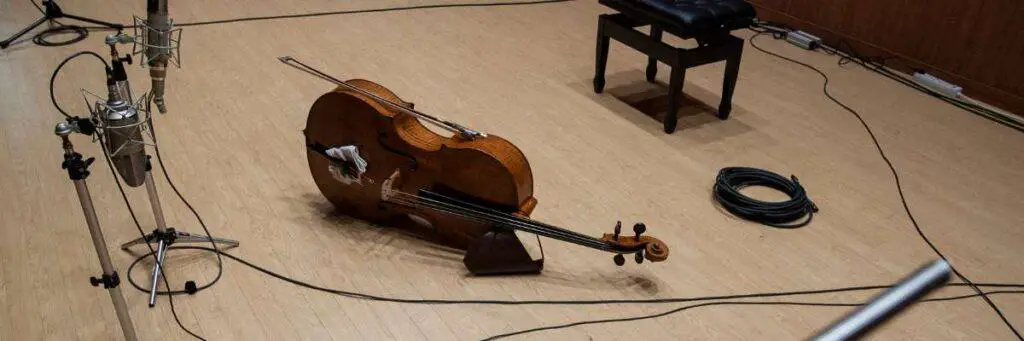
When it comes to recording a cello, the microphone placement is crucial to capturing the rich and full-bodied sound of the instrument.
A well-placed microphone can make all the difference in the final recording, whether it’s for a live performance or studio session.
In this article, I will explore the best techniques used to mic a cello, from understanding the instrument to choosing the right microphone and preamp.
Key Takeaways
- Understanding the unique sound characteristics of the cello is crucial for capturing its full-bodied sound.
- Room acoustics play a significant role in the recording process and should be taken into consideration when you need to mic a cello.
- Choosing the right microphone and placement technique can make all the difference in achieving a natural and balanced sound.
Table of Contents
How to Mic a Cello
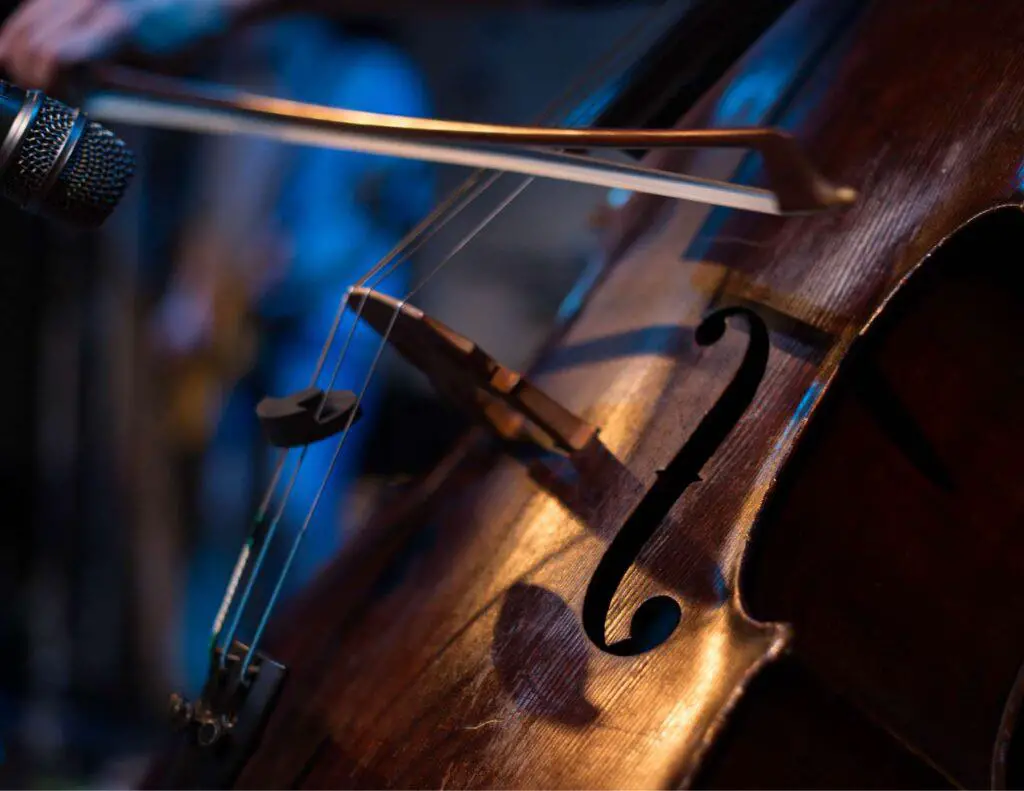
To mic a cello, position a condenser mic 12-18 inches away, aimed at the F-holes. For a balanced tone, center it; for brightness, move it closer to the bridge. Use directional mics to minimize noise, or opt for clip-ons for consistent live sound. Adjust based on room acoustics and monitor through headphones.
Finding the Sweet Spot
The sweet spot is the area on the cello where the sound is the most balanced and natural. It is usually located between the bridge and the fingerboard.
To find the sweet spot, start by placing the microphone about 4 to 6 feet away from the cello, directly in front of the bridge. Adjust the position of the mic until you find the spot where the sound is the most natural and balanced.
Dealing with Proximity Effect
Proximity effect is the increase in bass response that occurs when a microphone is placed close to a sound source. This effect can be useful when recording some instruments, but it can be problematic when recording a cello.
To avoid the proximity effect, place the microphone a few feet away from the cello. If you need to place the mic closer to the cello, use a high-pass filter to reduce the bass response.
Avoiding Bleed
Bleed is the sound that is picked up by the microphone from other instruments or sound sources. Bleed can be a problem when recording a cello because it can result in a muddy or unclear sound.
To avoid bleed, use a directional microphone and position it so that it is pointing away from other instruments or sound sources.
Microphone Types and Their Characteristics
Choosing the right microphone for recording a cello is crucial to achieve the desired sound. There are different types of microphones available in the market, each with its own unique characteristics. Here are some of the most common types of microphones used for recording a cello:
- Large Diaphragm Condenser Microphones: These microphones are highly sensitive and can capture the full range of frequencies produced by the cello. They are ideal for recording in a studio setting where you have control over the acoustics of the room.
- Small Diaphragm Condenser Microphones: These microphones are less sensitive than large diaphragm condenser microphones but are more directional. They can be used to capture a more focused sound and are ideal for recording in a live setting.
- Ribbon Microphones: These microphones are known for their warm, natural sound and are often used to capture the natural sound of the cello. They are less sensitive than condenser microphones and are ideal for recording in a studio setting.
- Cardioid Microphones: These microphones are highly directional and are ideal for capturing the sound of the cello while minimizing background noise. They are ideal for recording in a live setting where there may be other instruments or ambient noise.
The Importance of Room Acoustics
The room in which you are recording can have a significant impact on the overall sound quality of your recording.
Firstly, it’s important to choose a room with good acoustics. This means finding a room with a balanced frequency response, minimal reverberation, and low levels of background noise. A good recording studio will have been designed with these factors in mind, making it an ideal location for recording a cello.
However, if you don’t have access to a professional recording studio, there are still steps you can take to improve the acoustics of your recording space. For example, you can use acoustic treatment panels to absorb unwanted reflections and reduce reverberation.
It’s also important to consider the placement of your cello within the room. Placing the cello in a corner can cause the bass frequencies to build up, resulting in a boomy or muddy sound. On the other hand, placing the cello in the center of the room can result in a more balanced sound.
Understanding the Sound of the Cello
The cello is a string instrument with a rich and warm sound that is often described as being similar to the human voice. It produces sound through the vibration of its strings, which are amplified by the instrument’s body.
The cello is capable of producing a wide range of frequencies, from low to high. The lowest note on the cello is the C2, which is equivalent to 65Hz. The instrument’s frequency response is important to consider when choosing a microphone, as different microphones are designed to capture different frequency ranges.
The cello’s sound is also affected by its f-holes, which are located on either side of the instrument’s body. These holes allow air to escape from the instrument, which creates a resonance that contributes to the cello’s unique sound.
When played with a bow, the cello produces a sustained sound that is ideal for classical music. However, when played with pizzicato (plucked strings), the cello can produce a more percussive sound that is suitable for a wide range of genres.
Recording Techniques for Cello
Recording the cello can be a challenging task, but with the right techniques and equipment, you can achieve a clear and balanced sound. Whether you are recording in a studio or capturing a live performance, there are a few things to keep in mind.
Microphone Placement
The placement of the microphone is crucial in capturing the full range of the cello’s sound. A common technique is to place the microphone about 4 to 6 feet away from the cello, directly in front of the bridge. This will capture both the low and high frequencies of the instrument.
Another technique is to use two microphones, one placed near the bridge and another near the F-hole. This can provide a fuller and more balanced sound. It’s important to experiment with microphone placement to find the sweet spot for your particular recording setup.
Microphone Selection
Choosing the right microphone is also important in capturing the cello’s sound accurately. A large diaphragm condenser microphone is a popular choice for recording the cello. It can capture the instrument’s rich low frequencies and subtle nuances.
Recording Volume
When recording the cello, it’s important to keep an eye on the recording volume. The cello can produce a wide range of dynamics, from soft and delicate to loud and powerful. It’s important to adjust the recording volume accordingly to avoid clipping or distortion.
Classical Recording
If you are recording classical music, it’s important to consider the acoustics of the recording space. A room with natural reverb can enhance the sound of the cello. However, too much reverb can muddy the sound. It’s important to find a balance that complements the cello’s sound.
Live Performance
When you mic a cello for a live performance, it’s important to consider the stage setup. The cello should be positioned in a way that allows the sound to project to the audience. A microphone can be used to amplify the sound, but it’s important to avoid feedback by placing the microphone at a safe distance from the speakers.
Choosing the Right Microphone
When it comes to recording a cello, choosing the right microphone can make all the difference. There are several factors to consider when selecting a microphone, including the polar pattern, the type of microphone, and the intended use of the recording.
Considering Polar Pattern
The polar pattern of a microphone refers to the directionality of the microphone’s sensitivity to sound. There are several different types of polar patterns, including omnidirectional, cardioid, and figure-eight.
Choosing Between Omni and Cardioid
When recording a cello, the most commonly used polar patterns are omnidirectional and cardioid. An omnidirectional microphone picks up sound equally from all directions, while a cardioid microphone is more directional and picks up sound primarily from the front of the microphone.
Using Ribbon Mics
Another option for recording a cello is to use a ribbon microphone. Ribbon microphones have a unique sound that can add warmth and depth to a recording. They are also highly sensitive and can capture subtle nuances in the cello’s sound. However, they can be fragile and require careful handling.
Preamp and Other Equipment
When you need to mic a cello, the right preamp and other equipment can make all the difference. Here are some things to consider:
Preamp
A preamp is an essential piece of equipment for recording cello, as it amplifies the signal from the microphone and shapes the sound. A good preamp can add warmth, clarity, and depth to the cello’s tone, while a poor preamp can introduce noise, distortion, and other unwanted artifacts.
When choosing a preamp for cello, look for one that is transparent, low-noise, and high-gain. Some popular options include the Grace Design m101, the Millennia HV-3D, and the API 3124+.
Keep in mind that different preamps have different sonic characteristics, so it’s important to choose one that complements your microphone and the sound you’re going for.
Other Equipment
In addition to a preamp, you’ll need a few other pieces of equipment to mic a cello effectively. Here are some of the most important:
- Microphone Stand: A sturdy, adjustable microphone stand is essential for positioning your microphone in the right spot. Look for one that is heavy-duty and easy to adjust, with a stable base and a long boom arm.
- Microphone Cable: A high-quality microphone cable is important for preserving the integrity of your signal. Look for one that is shielded, low-capacitance, and well-made, with high-quality connectors.
- Pop Filter: A pop filter can help reduce plosives and other unwanted noises that can occur when recording cello. Look for one that is made of high-quality materials and is easy to attach to your microphone stand.
- Headphones: A good pair of headphones is essential for monitoring your recording in real-time. Look for headphones that are comfortable, accurate, and well-isolated, with a wide frequency response and low distortion.

Recording Cello in an Orchestra Setting
Recording a cello in an orchestra setting requires a different approach than recording a solo cello. The goal is to capture the cello’s sound while also blending it with the sound of the other instruments in the orchestra.
When recording an orchestra, a stereo microphone setup is recommended. Place two large diaphragm condenser microphones in an X/Y configuration above the conductor’s head. This setup will capture the full sound of the orchestra and provide a good stereo image.
When it comes to miking the cello specifically, it is best to use a spot microphone. A condenser microphone is ideal for this purpose. Place the microphone 1 to 3 feet in front of the cello, aimed at the point where the bow meets the strings. This will capture the full range of the cello’s sound.
It is important to note that the cello should not be the only instrument that you spot mic. In general, any instrument that is not easily picked up by the stereo microphone setup should be spot miked.
When mixing the recorded tracks, it is important to balance the levels of the spot miked instruments with the overall sound of the orchestra. This will ensure that the sound of the cello blends well with the rest of the orchestra.
Achieving a Natural Sound
When you mic a cello, achieving a natural sound captures the true essence of the instrument and allows it to shine through in the mix. Here are some tips for achieving a natural sound when you mic a cello:
- Mic Placement: Placing the microphone 1 foot (30 cm) from the bridge is a good starting point for capturing a well-balanced sound. However, it is important to experiment with different placements to find the sweet spot that works best for your particular setup.
- Microphone Type: Consider using a directional mic (cardioid) to mic a cello. This type of mic is great for capturing the nuances of the instrument and helps to eliminate unwanted background noise.
- Room Acoustics: The acoustics of the room can have a big impact on the overall sound of the recording. When possible, try to record in a room with good natural acoustics. If this is not possible, consider using acoustic treatment to improve the sound quality.
- EQ and Compression: Use EQ and compression sparingly to enhance the natural sound of the cello. Avoid making drastic changes to the EQ or compression settings, as this can lead to an unnatural sound.
Frequently Asked Questions
What are the best microphones for recording a cello?
The best microphones for recording a cello are usually large diaphragm condenser microphones or ribbon microphones. These microphones can capture the full range of the cello’s sound and produce a warm, natural tone. Some popular options include the AKG C414, Neumann U87, and Royer R-121.
Where should I position the microphone when recording a cello?
The microphone placement for recording a cello will depend on the desired sound and microphone type. For directional microphones, placing the microphone close to the strings will emphasize the attack, while positioning it closer to the F-hole will emphasize the lower tones. For omni microphones, simply placing the microphone close to the cello is sufficient, but experiment with distance to find your preferred sound.
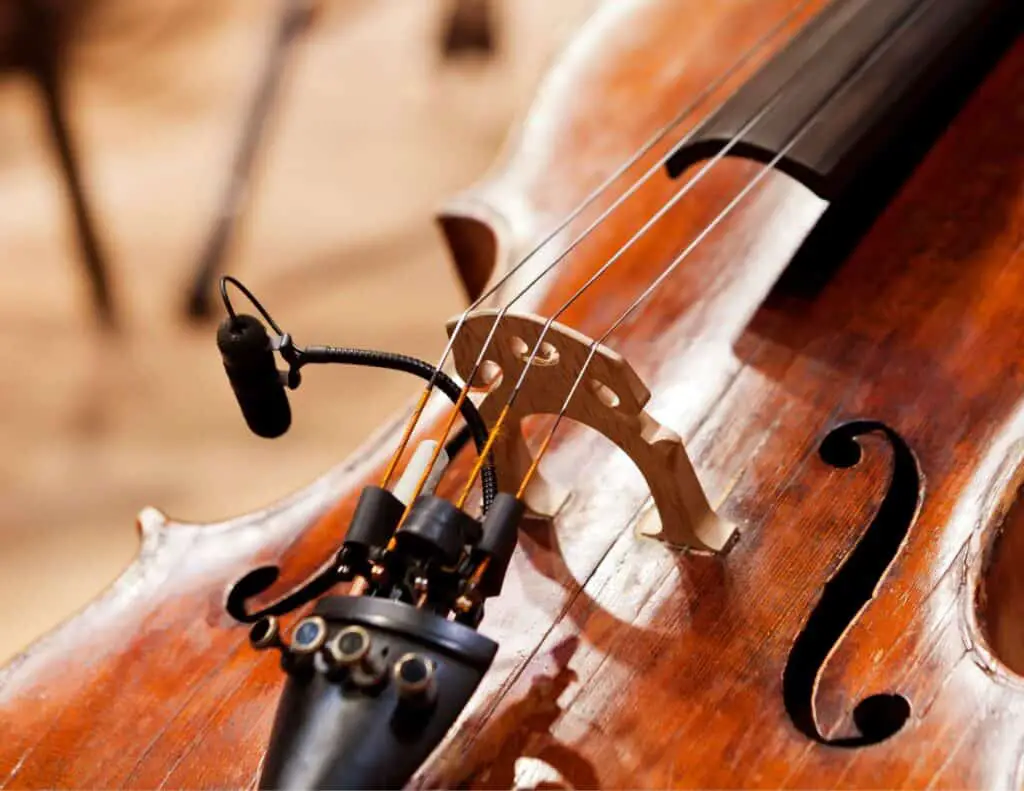
What is the difference between a clip-on microphone and a studio microphone for cello recording?
Clip-on microphones are designed to attach directly to the cello and are useful for live performances or situations where a studio microphone cannot be used. However, they may not provide the same level of sound quality as a studio microphone. Studio microphones are designed for optimal sound quality and are ideal for recording in a controlled environment.
How can I achieve a balanced sound when recording cello and piano together?
To achieve a balanced sound when recording cello and piano together, it is important to position the microphones in a way that captures both instruments equally. Placing a microphone above the piano and another near the cello can help achieve this balance. Additionally, using a microphone with a cardioid pattern can help reduce unwanted noise and focus on the desired sound.
Can a DPA violin or flute microphone be used for recording a cello?
While DPA violin or flute microphones are not specifically designed for recording a cello, they can still be used for this purpose. However, it is important to experiment with placement and settings to achieve the desired sound.
Should I record my cello in mono or stereo for optimal sound quality?
Recording a cello in stereo can provide a more immersive and realistic sound, but mono recordings can also produce high-quality results. Ultimately, the decision between mono and stereo recording will depend on the desired sound and the recording environment.